Friday, April 28, 2006

More HE shots for Bill


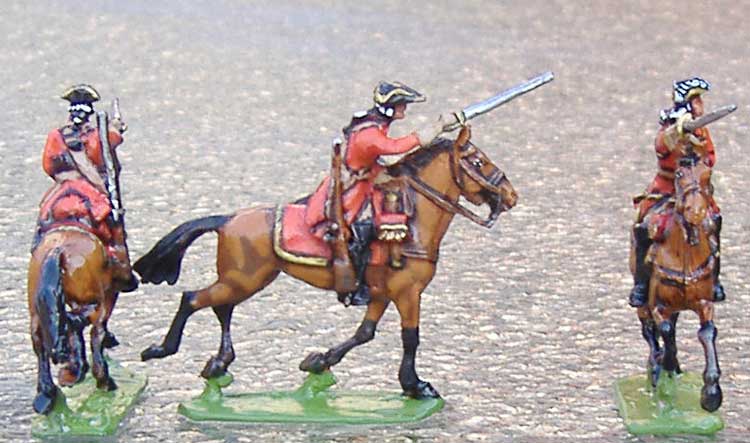
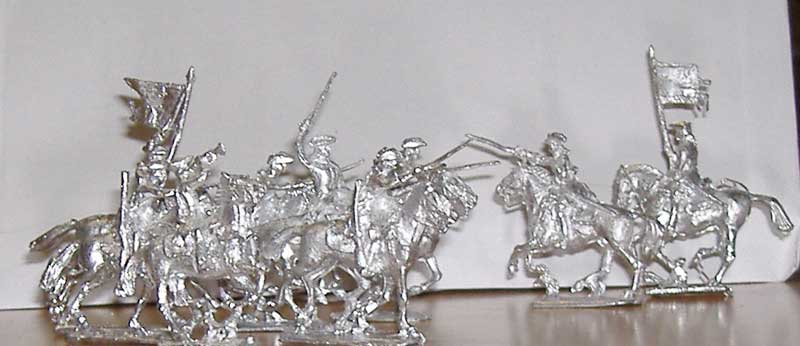
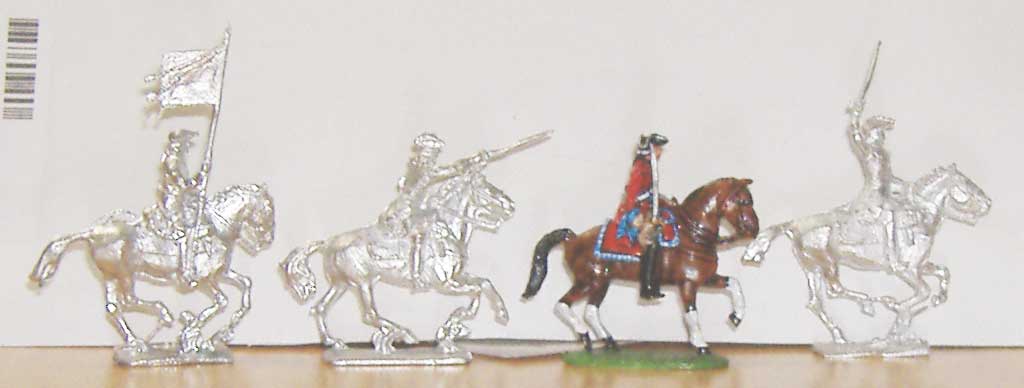
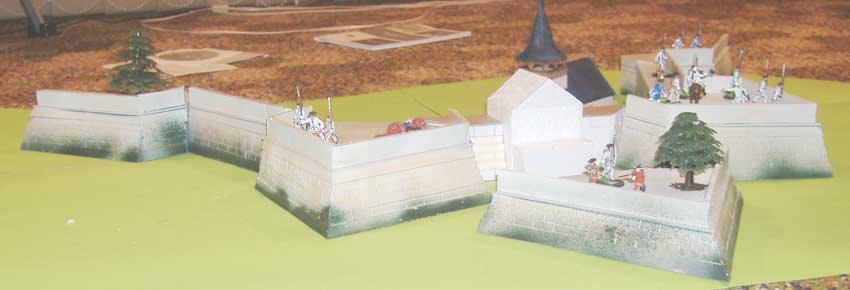
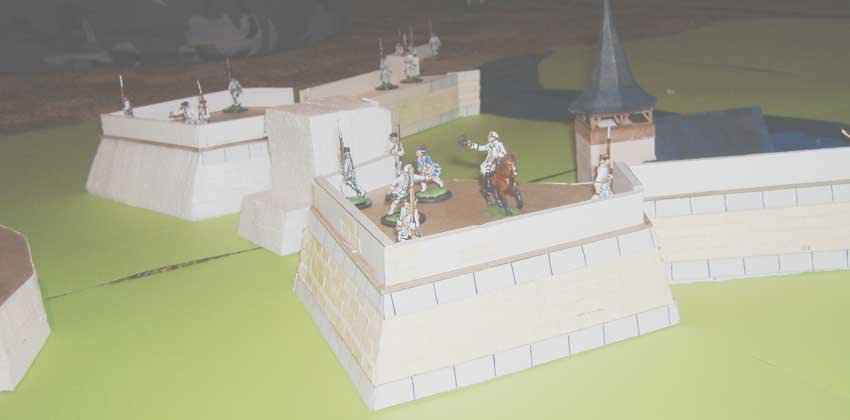
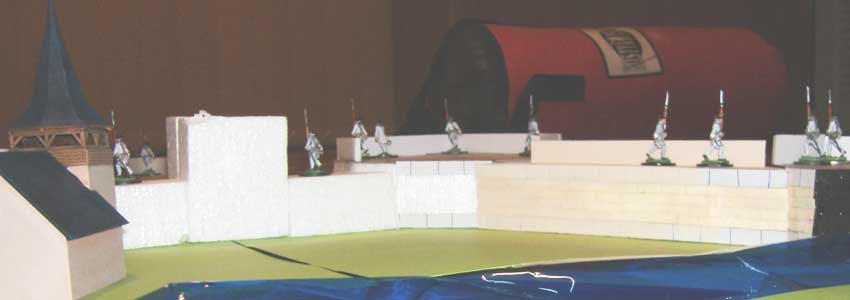
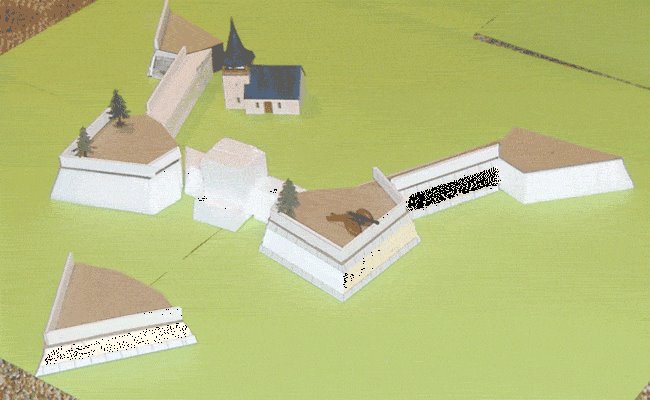
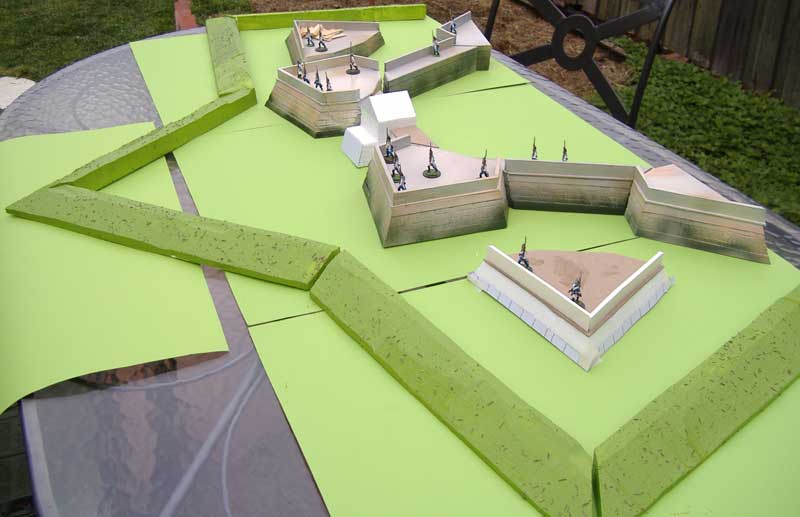
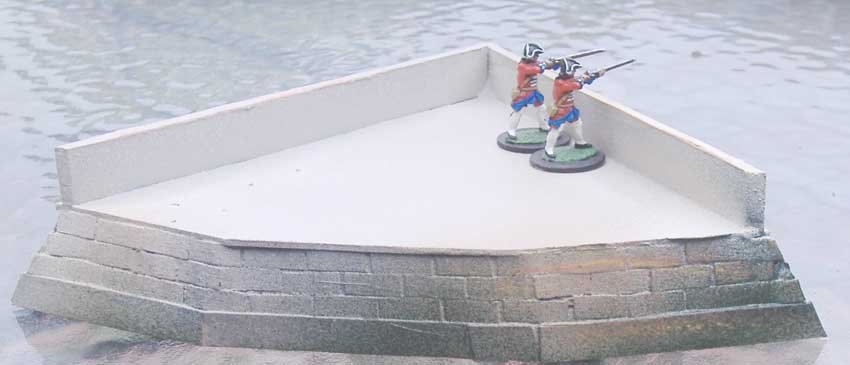
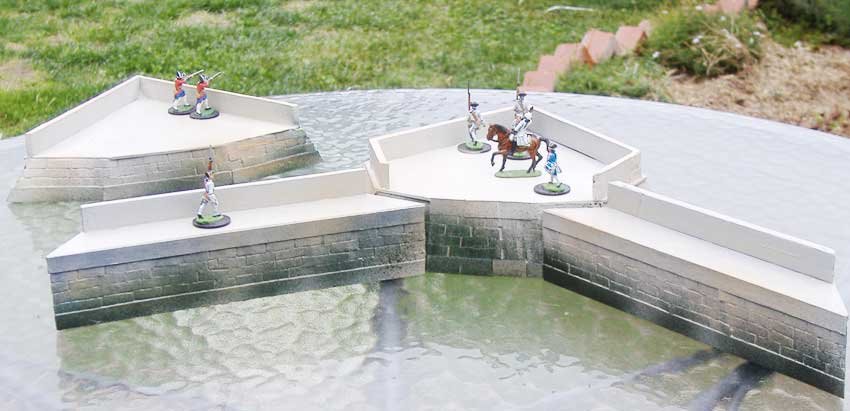
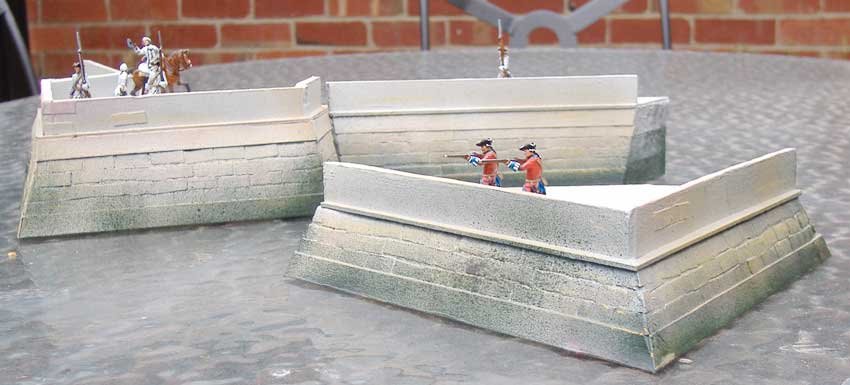
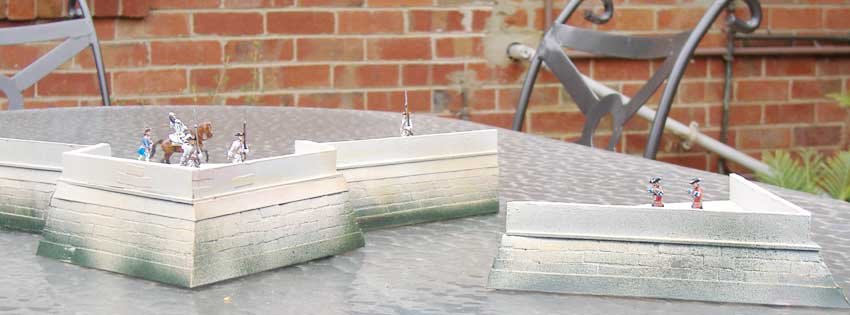
Some shots showing front, rear and "the other side" views.

Thursday, April 27, 2006

Painted HE Cavalry


I finally got around to finishing off few of the HE cavalry. They are painted more-or-less as Carabiniers. Just another 50 or so to go and I can think of rivalling Bill P's own monster unit.

I think they have painted up quite nicely, although I'm cringing a bit as this rather zoomed-in shot shows up EVERY SINGLE mistake I made while painting them..!

This being said, I do like them and will be buying more. I've also gone and bought samples of most of the HE Infantry - everything barring the pikemen basically, so stay tuned for more on the HE range. Oh, and I also bought a trio of the splendid-looking Spencer Smith artillery - I feel they'll make excellent train of siege artillery. I'm starting to think I may have to buy a unit of the Infantry - perhaps 48 privates and five officers might be a good place to start. Any Tips on what codes you'd recommend Henry?

Enough of me; on to the eye candy. I love that Colonel on the left of the picture.

Monday, April 24, 2006

HE Figures


I was pleased last night on getting home from work to find a sturdily-packed parcel of Holger Ericsson cavalry awaiting me. I'd ordered these from Spencer Smiths in the UK, and once the castings had made it to them from Sweden (a slow boat to be sure) to the UK, they made the trip to Australia very quickly indeed, and kudos to Peter Johnstone for being so on the ball.

So what was in the box?

What you get are very elegant and finely-proportioned figures. They measure about 28mm foot-to-eye and mix well with my RSM Cavalry which you can see from the comparison picture above. Remember that these are a good deal "slimmer" (read better proportioned) than say, Foundry or Old Glory. I'll be buying more of these as well as a regiment of HE Infantry in the very near future.

Be warned that detail is somewhat delicate due to the slenderness of the parts (I fear snapping a sword off!) and the casting a little crude in places due I would say, to the age of the moulds more than anything else; there is some small amount of flash and a little pitting on a couple of figures. For these reasons they may not be for everyone.

Speaking for myself I find them to be dramatically animated - I love the officer looking back over his shoulder as he urges his troopers on. The sculptor has really gooten an excellent sense of movement into these figures which yet retain something of the toy-soldier silhouette.

I would probably base them on larger plasticard bases as their own integral bases are a little slim and irregular in shape and I'd hate to damage the finished figures by having them fall over too often!

I will try to get one painted up tomorrow and post an image so you can make an informed judgement for yourselves.

Price lists and ordering information here: http://www.spencersmithminiatures.co.uk/

Books

I'm currently reading Reed Browning's 1993 "The War of the Austrian Succession" and have just seen the French capture Prague.

Poor old Austria ia at the absolute nadir of it's fortunes.

Still, I suppose the only way is up!

It's quite a readable book that seems to cover it's subject very well. It's refreshingly free of an Anglo-centrist point of view which is a nice change of pace from a lot of the history of the era I read (considering that English is the only language I read with any fluency, I suppose that's to be expected!).

A few more Fortress thoughts

I've enjoyed this project very much. So much so that I'm starting to cast about for another, and I'm thinking of doing a 30 Years War/ECW "Star Fort" - that is to say, a four-bastioned detatched work like the "Queen's Sconce" just outside Newark, Nottinghamshire.

I've an old Ian Weekly article from Military Modelling on building it, and it fooks pretty do-able.

Thursday, April 20, 2006

Fortress Progress Report


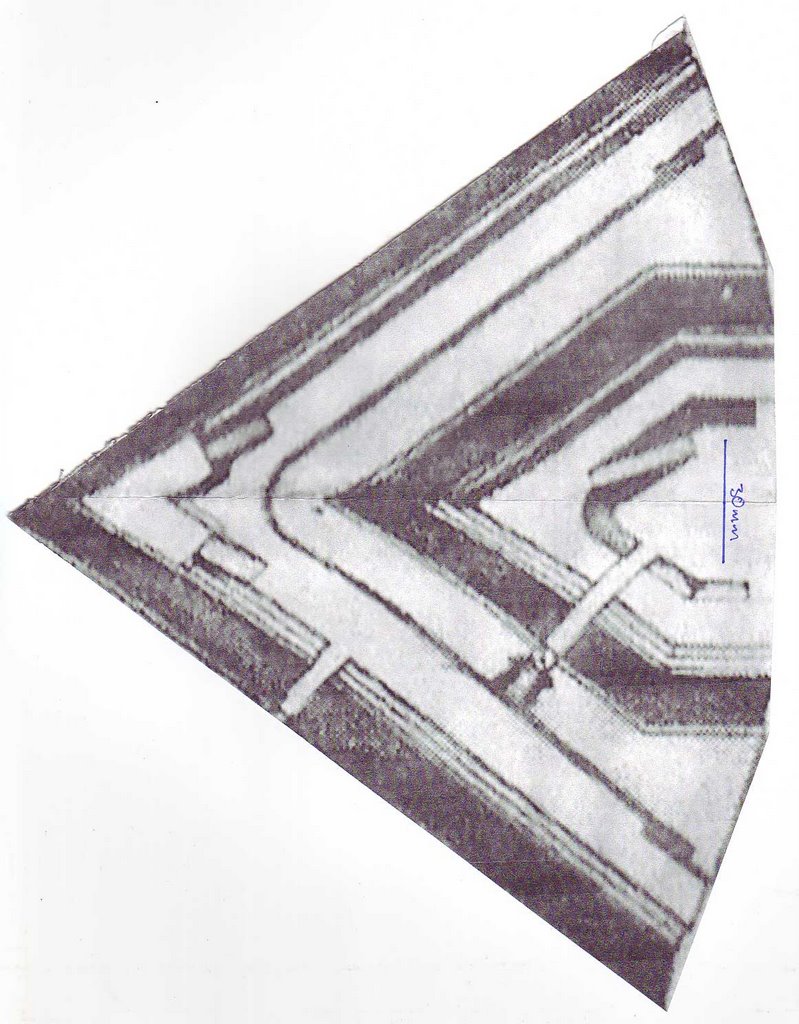
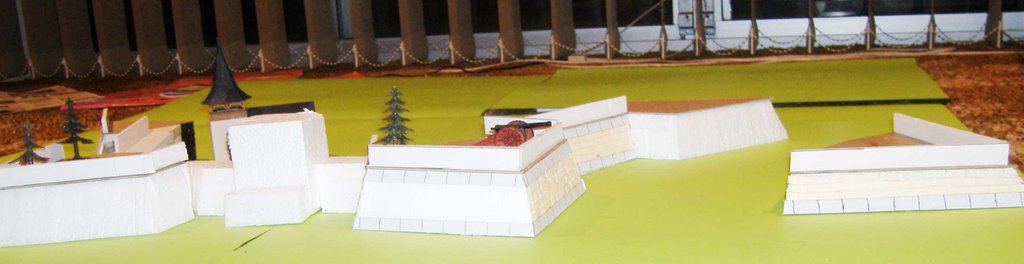
As you can see I have started work on the glacis and another ravelin.

The basic shape of the glacis seems about right; I'm fairly happy about how the pieces all fit together. Next stop will be to laminate card to the back and bottom of each piece before I carve the actual slops for each piece. The card will give me a hard couple of edges to run the hot wire cutter down.

Tomorrow night will see me cutting out the third ravelin preparatory to me starting to clad the two new ones in card.

I'm thinking of painting the whole glacis in something like Goblin Green (TM) paint with a couple of handsful of texture mixed into it. Following a suggestion from the OSW group (was that you Henry?) I'll probably go to my paint shop and ask them to mix me up a four-litre lot based on my own DIY colour chip. This ought to be a reasonable colour match for the poster-card I am using for the Blasthof terrain - the hill needs to be re-painted. It's too dark at the moment.

Any questions?

Tuesday, April 18, 2006

Reorganisation of the Duchy

Reorganisation? Or more possibly a clarification.

Let me make it clear to all who may ever have wondered that the Duchy of Alzheim is indeed a minor European state somewhere to the east of France, somewhere to the west of Saxony and somewhere to the south-west of Prussia.

It may or may not have a sea-coast.

It is a land of quite various geography, with lands both high and low, with mountains and plains. It may well have a sea-coast. It may well.

It certainly has a long history; it is well known that Alexander the Great while on a drunken carouse with a handsome young cavalryman got lost on the way to his tent and accidentally laid waste to three villages of the local celtic peoples, the Alzheimii before founding an Alexandria upon the remains thereof and settling a number of disabled veterans thereupon.

The following history was one of annexation to the Roman Empire, invasion by numerous Germanic tribes and a long, dimly-understood Dark Age under the rule of the Riders of Alzheim who carried on their wars with an unspeakable people who arose from no-where with the alliance of a great Prince who was rumoured to have strange powers of prophecy.

With the ascencion of their King, Alzheim became briefly a Kingdom attached to Lotharingia and then reverted to a more lowly status under the suzeranity of the Holy Roman Empire.

The wars of religion were unkind to Alzheim, who saw much ruin visited upon them by a mercenary who called himself "the Kreighund". The start of the Eighteenth Century was marked by Alzheims' ruling House unwisely allying with France (contrary to the interest of Austria) and thus suffering to have the armies of her greater neighbours marched all over her.

This fate is one which Alzheim seeks to avoid repeating if possible and to this end has imported a number of Hessian and Saxon Officers to the end of improving the state of her defences. Politically at present, Alzheim leans toward a defensive alliance with Saxony.

This may be of interest to Hesse-Seewaldt.

Monday, April 17, 2006

Templates


Gentlemen, the templates you see are from the top of this article, Ravelin bottom; Ravelin top; bastion bottom and; bastion top respectively.

Click on them to see the full-size, printable versions. Make sure that when you print them that the scale I have drawn on them comes out to 30mm long. If not, then right-click on the full-size version and save them to re-size them as you desire...

As you may be able to make out, they have all been folsed in half at some time to determinte their centre line. Superimpose one over the other with the rear edges directly above each other on your polystyrene slabs. Your templates will then be perfectly aligned.

Any questions, please drop me a line.

I want to see your pictures of your own fortresses, Gentlemen.

Wall templates will follow in a few days.

Fortress Templates

I have uploaded templates for Bastions and Ravelins for my fortress to the Old School Wargames Yahoogroup. If anyone has any questions, please don't hesitate to ask.

Wall templates to follow.

Thursday, April 13, 2006

Small Boats


This morning I finished painting the first two of my five small boats. I intend that they'll be fairly versatile, being used as pontoon bridges, ferries &c.

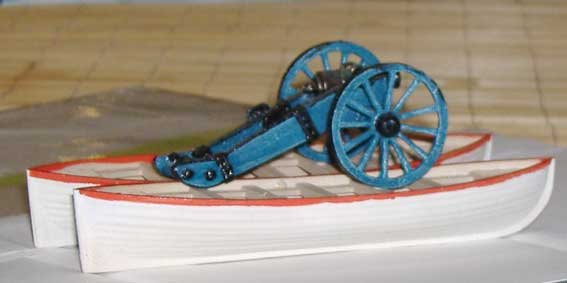
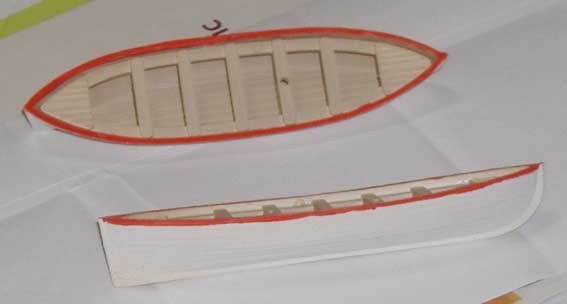
In the latter role, I will build a small, detatchable deck to run a gun or other stores onto.

This leads me to think that it is time foe me to create a corps of pontoniers and recruit some engineers.

Furthermore, I might have to get some gabions - I'm thinking of building a pair of battery positions for some siege artillery. Can anyone suggest a method of manufacture or, failing this, a manufacturer?

Wednesday, April 12, 2006

A few random thoughts...

I am sitting in the room I have set (for the moment! temporarily!) aside for laying out the fortress.

Looking carefully at it, it came to me that if I were to complete the circuit of the walls, I would have a pentagonal fortress of five bastions on my hands. Perhaps this could be a future project - I would need another two bastions and two lengths of wall. What's that? A week and-a-half's work? The two half-bastions I have go together reasonably neatly. Not perfectly, but not too badly.

The next thought that came to me was that it would be immensely cool to complete that circuit, and set the fortress up on a table with a hatch in the middle and be able to poke my head through it (a la Peter Young) and survey the field from within my fastness.

More Finished Components


As you can see all components of the fort for this round, barring the gatehouse, are complete. I'm a little concerned by the darkness of the green in some places, so I'll probably do a couple of light over-spraus of tan here and there. I'm very pleased wth the effect of the tan overspray on the pale ivory-gray base colour.

The gatehouse needs to be taller... and the great big step thing out the front of it needs to go.

Monday, April 10, 2006

Fortress Progress

This morning I finished undercoating the last demi-bastion and also finished card-cladding the last full bastion.

With luck thise two components ought to be finished by this time tomorrow. The rest of the week should see me getting onto building the gate-house. The basic shape is there in polystyrene, and I have some old Brettonian shields and parts from a Prince August cannon casting for a crest and a trophy of arms to dress it with. I'll probably use some old mounting board I have to do the gateway with, and some dowel to form the ornamental pillars.

The last job will be to build some gun platforms for the artillery I intend to mount on the fortress. I've had the guns for a while, Hinchcliffe 24pdrs on fortress mounts - but only four of them. I think I'll buy another four to fully arm the fortress.

Then that'll be it. All done.

For my next project I intend to put together a glacis for the fortress. Also, I bought some model boats on the weekend. I got five of them for $AU17.50 (multiply by about 0.74 or divide by 2.4 to get the $US or GBP figures respectively) from a place that sells model boat bits. I thought they might make nice supports for a pontoon bridge. I'll let you know how that goes.

So here we are at this blog's 100th post.

Again, I want to thank everyone who has dropped by and taken a look or even left a comment, tip or hint.

Thanks to you all.

Sunday, April 09, 2006

Painting the Fortress

I've already mentioned that I undercoated the fortress in plack. The idea here was that should the painting miss any crevices , they would look shaded. As it turns out, I don't think i missed too many bits!

The model was painted in Tamiya spraypaints. Base coat was the palest gray I could find with a few oversprays of a slightly darler gray. I then painted back with the lighter gray to blend the darker in in places; the idea was just to vary the base colour a little. Spray-paints are great in terms of their very high quality finish, but so need to be broken up as this finish can look quite artificial.

The next layer of colour was some smallish, randomly-applied patches of a light tan which I applied to about 30% of the models' vertical surfaces, not being too bothered is some went onto the horizontal surfaces, but not aiming for it either. Finally I sprayed areas of green patchily onto the bottom fo the vertical surfaces, allowing it to drift 'up' a little to simulate algae and other water-borne nastiness that you might get if the fortress was standing in a wet moat.

The last touch was to rub some chalk pastel onto my finger-tips and then roughly over all the raised areas of the model. Some red, orange and yellow ochre. Less is more here and the idea should be to apply tiny patches of pure colour to slightly brighten what to now has been a fairly dull colour palette.

The chalk was sealed in place with a spray fixitave which can be got from any art store. This needs to be done because dry chalk pastel rubs off very easily.

Painted Fortress Elements


Thursday, April 06, 2006

Mirenburg's Bastioned Walls. (Baedecker, 1977)


Again, Colonel de Castel-Jaloux dominates the scene, but the view is somewhat refreshed by a nice prospect of the tower of the Kleine Kirche. This slender structure stands in interesting (and perhaps somewhat Phallic) counterpoint to the masculine bulk of the North and North-Eastern bastins that flank the Kings' gate and it's famous, leafy parapet walks.

Completed front of Fortification


This image shows a bastion, a length of curtain wall and a demi-bastion virtually complete but for the sealing of the exposed edges of the foamcore.

The need to be undercoated to stop the pale gray spray-on base-coat from dissolving the polystyrene sub-structure. I admit that I considered this as a means of producing a breached section!

I feel that this image gives something of the same impression of almost inhuman massiveness that the real thing may have had.

That is Carbon de Castel-Jaloux there, greeting one of his under-officers, Captain Bellerose.

More Fortress Pix


I hope this image shows the process which I have gone through to prepare this terrain item. From the middle of the picture we see the bare polystyrene of the gatehouse; in the centre-right is the wall with mock-ashlar masonry, heavy card platform and foamcore parapet; while on the far right is the fully clad wall and demi-bastion with the bricks made from manila folders put through a document shredder!

At the left of the picture is the Kliene Kirche, a HO railway accessory from "Kibri".

Click on this image (or any other of course) for a larger version.

Wednesday, April 05, 2006

DPC French Infantry


Representing the Bourbonnois reiment, this company (in the "Charge!" organisation) is made with DPC French infantry - marching pose.

New Purchases

Today I finally surrendered to temptation and bought a couple of books from Amazon.

They are "Prussia's Glory" (following a word of praise from Bill P.) and "Instrument of War", both by Prof. Christopher Duffy. The former is an analysis of Rossbach and Leuthen, the latter a masterly in-depth survey of the administration and organsation of the Royal and Imperial Austro-Hungarian Army.

I'm looking forward to these! To go with "Instrument of War" one day I'd love to get my hands on Lee Kennett's 1967 treatment of the French Army as an institution. I read -and photocopied large chunks of it - at university in the late eighties.

While I'm on the subject of books, would anyone care to recommend a fairly modern work on the war of the Austrian Succession? Always been very interested in the conflict, but works on the subject are a bit thin here in Australia.

On the toy soldier front, I'm hoping to take delivery in a few weeks of a bag each of advancing French infantry and charging chevaux-legere from DPC. The Infantry will go towards the Volontaires de St Victor I mentioned earlier along with a few in the stand-and-fire and kneel-and-fire poses to give the less formal look I imagine the light corps of this era had. The cavalry, well, let's say that I have been rather inspired by a certain large cavalry "brigade" that has just had an airing in the USA.

Jim P. reckons DPC are thinking of doing some additional command figures (I'd love some french Officers and NCOs with pole-arms) and in addition, they are finding the odd Steve Hezzlewood mould they never knew they had. One being a seige howitzer. To my eyes this is of course rather opportune.

The sooner these items make the catalogue the better!

It's been brought to my attention this blog is getting recommended as one of the places to go for pix of the DPC 7YW range. I'll have to a) get some better pix up - I recognise that my photography skills weren't worth much in the earlier parts of this Blog and b) hit on DPC for some freebies!

Saturday, April 01, 2006

Wall detail


I think this shows the basic method I have used for detailing the basic slabs of polystyrene that make up the fortress; foamcore parapet, heavy card "roof" with a slight lip overhanging at the front. The card strips scored with a pen representing the heavy stonework and the thinner manila card chopped up with a shredder for the uniformity of effect making up the smaller "stones".

The mounted officer is that delightful raconteur Carbon de Castel-Jaloux.

I need more ravelins!


Low shot with my one ravelin repositioned to the right. I need more 30mm slabs of polystyrene!

The gatehouse looks more and more ordinary to me too. I might pull it to bits and start anew.

Fortress progress images


I hope these two images get across a general idea of how things are going. The two curtain walls are completed in all but the painting. The right-hand bastion is nearly there but for some card masonry. The left-hand one needs lots of masonry and part of the parapet to be done. The ravelin is done barring some card detail on it's rear face.

Given another week and all the fairly tedious detail work will be done.

The Kleine Kirche got painted when I couldn't take sticking little card rectangles down for another second one evening!

The gun is a "Willie" - the way cannon ought to be to my mind; big.

John Ray suggests using 25mm scale cannon with 30mm scale wheels. This is an idea I'd like to try out for looks.

I'm also starting to think it'd be cool to do little balsa gun platforms, and wooden paths on the insides of the parapets.

Blasthoff terrain bits


As I hope can be seen in this picture, I pretty well have all the terrain elements in place now that I need to do Blasthof with.

I really like this shade of green - it has quite a nicely artificial look to it that should go well with the rest of the terrain. That blurry little cottage in the background is by Dapol and needs it's paint-job completing.

I'll start work on the bridge this weekend and cut the path of the River Blast.